Saturday, October 29, 2011

Knitting Pattern: Classy Collared Capelet for Pullip & Blythe


Based off of a Bernat pattern I found, this wrap makes the perfect fall cover-up for a coordinating dress.  You can choose, like I did, to use a contrasting color for the collar and trim, or you can go with a solid like the original, human version.  Either way, it’s a very simple piece with minimal finishing (if you hate sewing tiny seams as much as I do, you’ll love that there are none) and a lovely yarn over increase detail.  The unmodified pattern will fill Pullip and Blythe; I think it will fit a Barbie if you go up a needle size.


Classy Collared Capelet for Pullip


Materials:
  • Size 1-US needles (for knitting flat)
  • One ball MC (you will need far less than a full ball) of size 10 crochet cotton
    • Used for example: Aunt Lydia’s Classic Crochet Cotton (100% mercerized cotton, 350 yd/ball) in 419 Ecru (MC) and 492 Burgundy (CC)
  • Four stitch markers
  • Two small buttons (I used ¼” buttons)
  • Scissors & darning needle
You will need to know:
  • How to knit and purl (and how to combine them into K2 P2 rib)
  • How to yo
  • How to pick up stitches along a cast-on edge and a side edge
  • The m1p increase
  • How to bind off in rib
Gauge: 11 sts/per inch in stockinette stitch on size 1-US needles.  To ensure accurate sizing, be sure to check your gauge.

Capelet:
With MC, CO 28 sts.  P1 row.
SETUP ROW: k2, yo, PM, k1, yo, k5, yo, PM, k1, yo, k10, yo, PM, k1, yo, k5, yo, PM, k1, yo, k2.  P the next row.

Work this row until you have 108 stitches (10 repeats):
*K to marker, yo, slip marker, k1, yo, rep from * to last marker, yo, k to end.  P all WS rows.

When you have 108 stitches on the needle (or if you are changing the length of the capelet, when it has reached the length you want), change to CC and k 1 row.
Next row (WS): P3, (k2, p2) to last st, p1.
Next row (RS): k3, (p2, k2) to last st, k1.
Repeat these two rows one more time for a total of 4 rows of ribbing in CC.

Collar:
With RS facing, pick up and knit one stitch for every CO stitch, for a total of 28 sts on the needles.
Increase row: (p4, m1p) to last 4 sts, p4.
Work in k2, p2 rib for about ¾ of an inch or so, or until the collar is the length you want it to be.  I wanted mine to stop at the shoulder joint, so I worked 11 rows.  It does not matter if you end on a RS or WS row, as long as it looks right to you.  BO loosely in rib.

Button Bands:
Note: if you changed the length of your capelet or collar, you will need to adjust these numbers as well.  Just pick up 3 stitches to every 4 rows and try to finagle it into being a multiple of 2.
LEFT FRONT: with RS facing, pick up and knit 32 stitches along the left front edge.  Work 4 rows in 2x2 rib and BO loosely.  Mark where you want the two buttons to be (no need to get fancy here).
RIGHT FRONT:  with RS facing, pick up and knit 32 stitches along the right front edge.  Work 1 row of 2x2 rib.  Work a row of 2x2 rib and when you come to the buttons, yo, k2tog to make buttonholes, working the rest of the row in pattern.  Work 2 more rows of 2x2 ribbing and BO loosely.
Weave in all ends, block, and attach buttons where marked.

Saturday, October 22, 2011

Knitting Pattern: Stitch & Bitch "That Seventies Poncho" sized for Pullips & Blythe

Inspired by “That Seventies Poncho” from Stitch ‘N Bitch Nation, by Debbie Stoller, this retrofabulous accessory will make your Fruit Punch and Pow Wow Poncho girls totally jealous!  Just a warning, though – while doll clothes are generally pretty quick to knit, by the time you get to the bottom of this one, it can be a bit exhausting (you might have around 160 stitches on the needles if you follow this pattern verbatim).  Luckily, though, it’s STILL only a doll poncho, so it goes quicker than a human version, for sure – and the results are totally worth it.  Try it in these fruity brights, or maybe greens-aquas-yellows-and-whites; or pinks-and-purples, for a super-girly look.

Pullip That Seventies Poncho


Funky color scheme optional.  Eve gave me no choice!

Materials:
  • Size 1-US needles (for knitting flat)
  • One ball (you will need far less than a full ball) of size 10 crochet cotton in your choice of colors.  Even a solid-colored poncho will not require a full ball.
    • Used for example: Aunt Lydia’s Classic Crochet Cotton (100% mercerized cotton, 350 yd/ball) in:
      • 901 Pagoda Red
      • 012 Black
      • 493 French Rose
      • 431 Pumpkin
      • 001 White
  • Small snap, hook and eye, hook and loop, or closure of your choice
  • Scissors & darning needle
You will need to know:
  • How to knit and purl
  • How to m1
Gauge: 11 sts/per inch in stockinette stitch on size 1-US needles.  To ensure accurate sizing, be sure to check your gauge.

Poncho:
CO 35 sts.  K2 rows.
Next row (RS): k1, m1, k16, m1, pm, k1, m1, k to last st, m1, k1.

P next and all subsequent WS rows.
Next and all subsequent RS rows: k1, m1, k to marker, m1, slip marker, k1, m1, k to last st, m1, k1.

Repeat as established (working increase row every RS row and p all WS rows) until you have reached the length you want for your poncho.  

The color pattern I used for my poncho, approximating the Stitch & Bitch version, is as follows:
4 rows red (including the first 2 knit rows), 2 rows black, 4 rows pink, 8 rows orange, 6 rows red, 4 rows white, 10 rows pink, 6 rows red, 6 rows orange, 4 rows black, 2 rows red, 4 rows pink, 2 rows white, 1 row red, and then BO in red.

Block.  Using mattress stitch, close back seam about ¾ of the way up.  Close the top with a hook and eye or snap.

I did not do a drawstring on my poncho.  If you wanted to, add some evenly spaced eyelets (yo, k2tog) around row 3 and weave in a length of crochet chain stitch or braided thread.  Also, in the original pattern, there are occasional rows of garter stitch; all you have to do to accomplish this is to knit the occasional WS row.

Saturday, October 15, 2011

Knitting Pattern: Off-the-shoulder Top

Knit entirely in the round (so no seaming! yay!), this easy-peasy top looks super cute and takes practically no time.


Off-the-shoulder Top (Short sleeves)


Materials:
  • Fingering weight yarn.  Used for model: DMC Senso Wool Cotton (70% cotton, 30% wool), color no. 1305, equivalent to size 3 crochet thread.  100% cotton is not recommended, because it knits up thick without stretch.  Try very thin sock yarn.  You will need far less than one 100 yd (29g) ball
  • Two size 1-US circular needles or a set of size 1-US DPNs.
  • Darning needle, ruler, and scissors
You will need to know:
  • How to knit in the round
  • How to work 1x1 ribbing in the round
  • How to cast on mid-way through a round
  • SSK and K2tog
  • The m1 increase
Gauge: 10.5 sts/per inch in stockinette stitch on size 1-US needles.  To ensure accurate sizing, be sure to check your gauge.
    Instructions:
    CO 36 sts.  Being careful not to twist, join for knitting in the round.  Work 3 rounds in 1x1 ribbing.


    Place marker after first 18 stitches.
    Decrease round: K1, ssk, k to last 3 sts, k2tog, k1.  Repeat for back needle.
    Work decrease round, then knit one round.  Do this four times total, until you have a total of 20 sts on the needles.


    K2 more rounds.


    Begin increase rounds to shape for ribcage.  Work the following repeat of 3 rounds three times:
    Round 1: K1, m1, k to last st, m1, k1.  Repeat for back needle.
    Rounds 2 and 3: k all sts.


    You will end this round with 32 sts.  At the end of this last round, CO 8 sts.  Continue knitting to the next marker and CO 8 more sts.  You now have 48 sts.  K to end of round.  Beginning with the newly CO sts, begin to work in 1x1 ribbing.  Work 3 total rounds in 1x1 ribbing.  BO all sts.


    Stretch the armholes with a larger knitting needle or some other implement roughly the size of a doll arm (i.e., a pinky finger).  Weave in the two ends and you’re done!

    Saturday, October 8, 2011

    Sewing Tutorial: Kindle Book Case

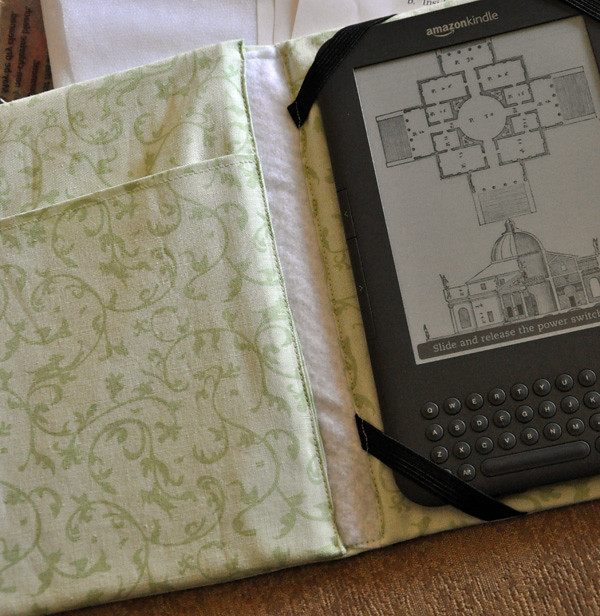
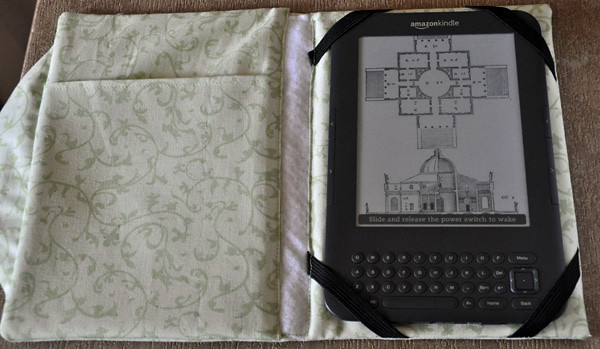
    My attempt at a "book" style cover for Kindle.  My sewing skills aren't the very best, but the geometry is correct and a neater seamstress will be able to produce better results.


    Supplies & materials:
    • Mat board OR stiff plastic canvas (if you plan on washing the piece), 2 pieces that measure 8 × 5.5”
    • Note: I cut my mat board with a fabric rotary cutter and trimmed it down with a craft knife (like an “X-Acto”). I don’t recommend using scissors on mat board; if you don’t have the necessary tools to cut it, then just use some stiff plastic canvas.
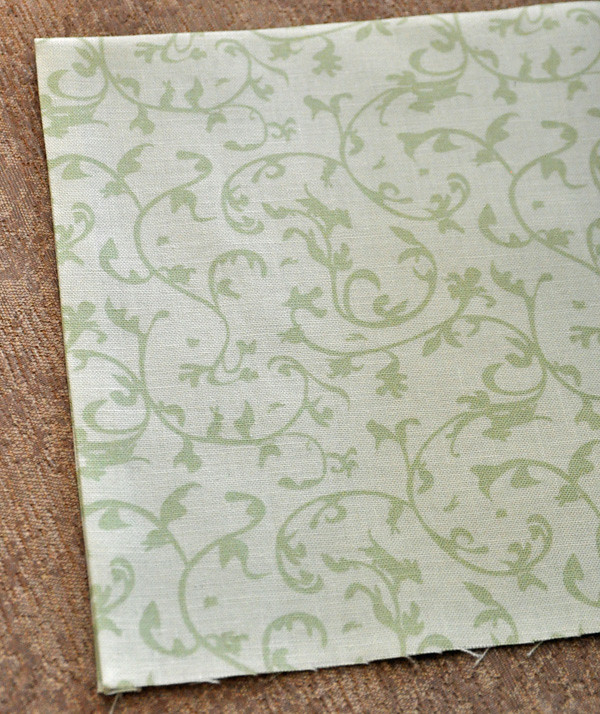
    • Fat quarter or half yard of your choice of fabric (you can use two fabrics, outer and lining, if you like). Suggested fabrics: cotton solids, calico, denim (outer fabric), PVC/"pleather" (outer fabric)
    • 12” of ¼” wide elastic
    • Sew-on snap or (weak) magnetic snap closure, hook and loop (Velcro) or button (a button will not allow you to close the “book” backwards; no big deal if you don’t care)
    • Felt or thick fabric, 2” by 9”
    • Ruler
    • Sewing machine, needle appropriate for fabric, and thread
    • Iron set to heat setting appropriate for main fabric
    NOTE: ALL SEAM ALLOWANCES SHOULD BE AS CLOSE TO ⅜ AS YOU CAN GET.  SEW SLOWLY TO ENSURE ACCURACY AND NEATNESS.

    READ ALL DIRECTIONS BEFORE YOU BEGIN.

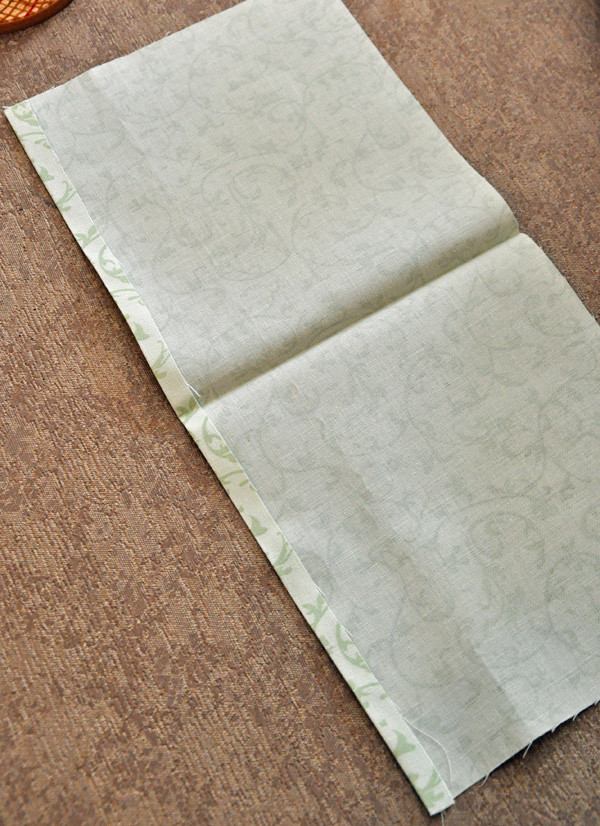
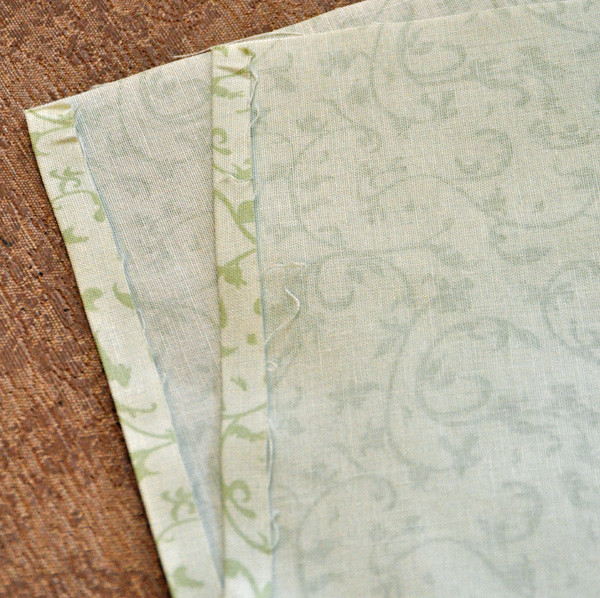
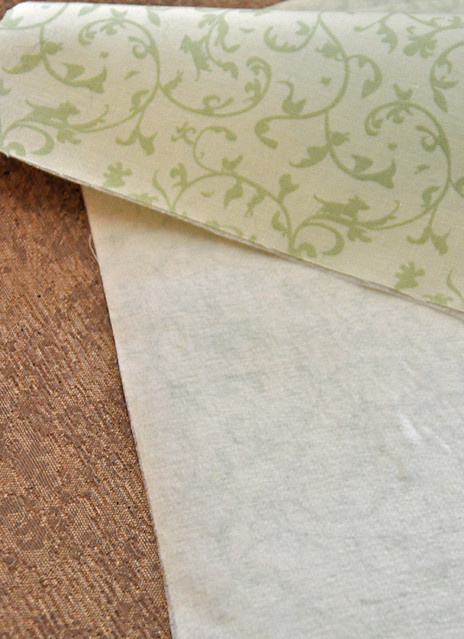
    Press your fabric and cut out your pattern pieces.
    • Outside fabric: 12 ⅝ × 9” (If you are using a different fabric for the outside, use it here. This fabric may be doubled or interfaced if desired. If you double it, baste both pieces together right side in; if you interface it, I recommend medium-weight fusible interfacing.)
    • Inside fabric (cut 2): 6 ½ × 9” (These may also be interfaced if you want. I would use lightweight fusible.) I will refer to these pieces as “inside pockets” since they will enclose the mat board/plastic canvas.
    • Inner pocket (optional) (cut 1): 13 × 6 ½” (will be folded width-wise)
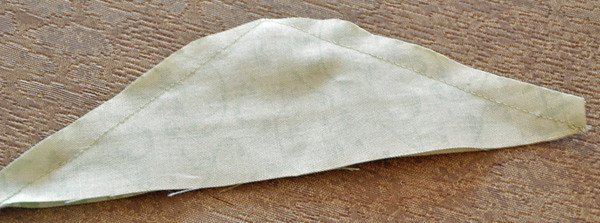
    • Flap (cut 2 [outer fabric]): Cut an isosceles triangle with the base being 9” long and the height/altitude being 3”. This is most easily accomplished by folding the fabric along the altitude and cutting a triangle that is 3” along the fold and 4 ½” in a right angle from the fold, then connecting the two points via straight line. If you prefer a straight flap or other shape simply cut it to whatever dimensions/shape you like. A round flap would look nice, or you could just make a thin strap, or skip this step altogether if you have another creative idea to keep the whole thing shut.

    Diagram to cut out triangle flap.  This results in an isosceles triangle described above.
    1.      Cut 4 pieces of elastic, 3” long each.  Do not worry about cutting your felt.

     Press all pieces flat after cutting.

    Press one of the longer sides of the pocket piece (the 13 × 6 ½”) under about ⅜”.  

     Press it now width-wise, right sides out, so that it now measures almost 6 ½” square, ensuring that the narrow folded bit is tucked in very neatly.  

    Press in one long side of each inside pocket as close to ⅜” as you can get without burning yourself.  If you err, try not to make it wider than ½”.
     Apply fusible interfacing if you choose to do so.

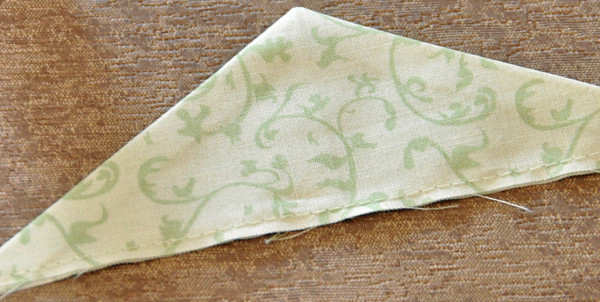
    With right sides together, stitch along the top edges of the triangle, leaving the base unstitched.  Trim the corners close to stitching and turn.   

    Press.  Baste along the raw edges of the bottom close to edge.
       
    Top stitch close to the folded edge of the inner pocket (not the hemmed edge; sew along the top that will form the top of the pocket itself).
    With right sides together, pin as follows:
    Pin each side pocket to the main fabric, having the pressed edges closest to each other.
    Pin in the elastic, so that it will catch in the seams, across each corner of the left side pocket, which will be the right pocket when turned right side out.

    On the other pocket, sandwich inside the inside pocket the flap and inner pocket.  The order of fabrics should be:
    • Outside fabric
    • Flap
    • Inner pocket (the square piece that is folded)
    • Inside pocket (the part that will enclose the board)

    For the moment, don’t worry about the gap in between the inner pockets.  We’ll take care of that in a minute.


    This is what it will look like right before you stitch.

    Stitch carefully around the three pinned sides of the inside pockets.  Be sure you catch the elastic and all layers while stitching (this is why we need to pin it first).  Also be sure to leave the two pressed edges unstitched; otherwise you won’t be able to slip in the board!  Clip the corners and turn right side out.  You can slip in the board to be sure you push everything out completely.  Take out the board.
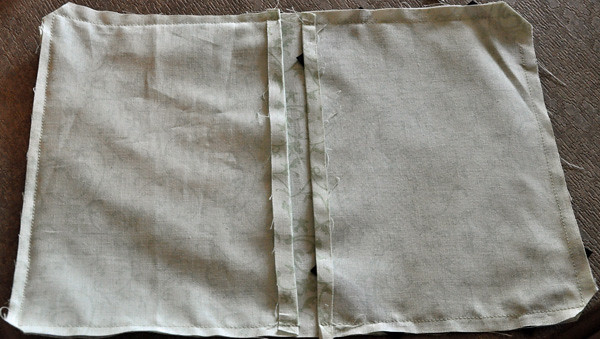
    Stitched, before turning right side out.


    Press.  I cannot emphasize how important this is!  If you are using mat board, you can press while the mat board inside, but do not have your iron hotter than wool, and don’t use steam.
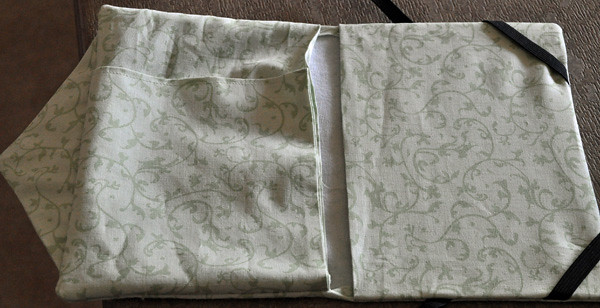
    Ensure that your pocket comes all the way around.  I thought I had stitched it wrong,
    but in reality, it just needed a little persuading.  Press after you get to this step.


    With fine, sharp scissors, clip the piece of back fabric where it attaches to the inside pockets.  You will only need to clip it about ⅜”.  Pin or press so that the bottom edge is folded, and the raw edge is captured up inside of it.  If you look at the photo above, these are the small strips of fabric left in the unstitched area between the two halves, at the top and bottom.

    Take your felt or thick fabric and tuck it inside the area where you can see the back side of the outer fabric.  Trim it to fit.  We want this to reinforce the hinge area of the cover.  It should fit inside the edge of each pocket, up to the pressed area of the gap.  After trimming, pin it in place.  Be sure you pin the elastic down very securely, and have a little fold at the edge to tuck the raw edge of the elastic down over the folded and pressed portion of the pocket.
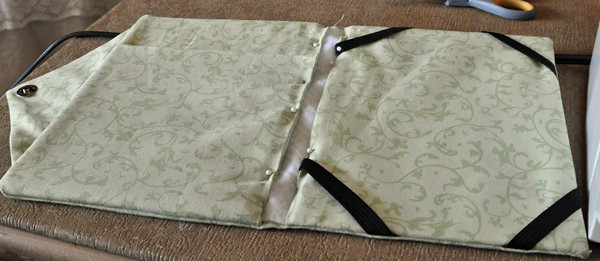
    In this view, the mat board has already been inserted as described below.

    Carefully slide in your mat board or plastic canvas.  It should be a pretty snug fit.  If you have any slack, push it to the edges and pin down the inner pockets very close to the edge.  If you have a lot of movement and it bothers you, you can turn it back inside out and stitch in a little closer.
     
    Now for the moment of truth: check the fit of your Kindle.  If it fits, close the “book” and wrap the flap around the back.  Seriously – guys – do this with your Kindle inside, or it might not fit.  Mark the place where the flap needs to go to close snugly.
     
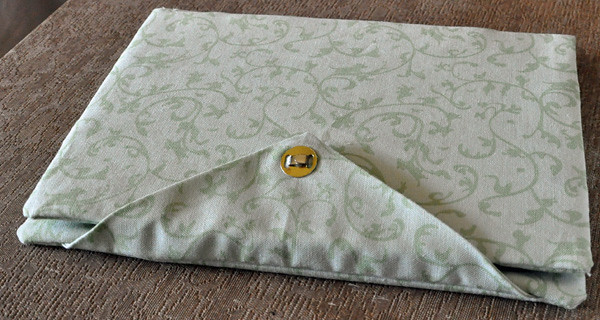
    Take out the fabric and sew on a button, snap, magnetic clasp onto the outer fabric – this is your last chance to do it without the board getting in your way!  *Note: due to the nature of the thing you are stitching, which is a pocket, this will suck.  Sorry.  (If you plan on closing the whole thing with an elastic band, you don’t have to worry about this part.)
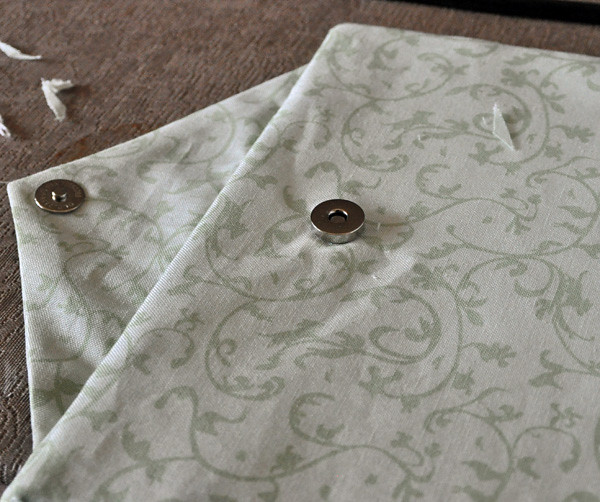
    The fact that I used a magnetic clasp made it not too bad, since I only had to cut two small slits in the fabric.
     
    Pin in the elastic, folded down, so that it will be caught when you topstitch in the next step.
    Using a zipper foot, topstitch through the inside pockets, through the felt, down to enclose the board.  If you don’t feel comfortable using a zipper foot or aren’t sure that you won’t stitch through the mat board or plastic canvas, you can always handstitch.
    I won't lie, this is the worst part of everything... but it goes by pretty quick.
     
    I would recommended hand stitching the little tiny flaps at the top and bottom of the felt-lined gap.  If you are a hoss with the machine, you can machine stitch it.  Kudos to your skills!  If you hate stitching altogether, just glue it down with some Fray-check or fabric glue.  Keep in mind, though, that this might stiffen the “hinge.”  I think, in the view above, I just tucked them under the felt, but I prefer for them to be on top of the felt, as I have done on the other two Kindle cases I have made.
    Per the "prancing pony" rule, the above mistakes do not technically count.
    I glued a button on to hide this.
    See?  Much better.
    In this view, you can see how a magnetic closure will keep the case open.
    The case isn't the most secure out there, but you could make some modifications to change that - such as another elastic band across the area between the screen and the keyboard, or a pocket sewn over the area where the keyboard is and the diagonal elastic on the top corners.  In a bookbag, though, it is just fine.  I have noticed that my Kindle is surprisingly sturdy, but I do want to keep it from being dinged up and scratched.

    UPDATE: my mom has had this case for several weeks now, and she said that she never has a problem with her device slipping out of it.  So maybe it's more secure than it looks!

    Monday, October 3, 2011

    Knitting Pattern: Pullip Anthropologie-Inspired Capelet

    Based on Julia Allen’s Anthropologie-inspired Capelet (Peony Knits designs), available on Ravelry.  For more information, see Julia Allen’s blog at http://peonyknits.blogspot.com.

    Pullip "Anthropologie-Inspired" Capelet


    A brooch used to close this made from an old earring would be a nice touch.
    You will need:
    • Size 1-US needles: Two DPN’s, straights, or a circular
    • Size 10 crochet cotton
      • Used for example: Aunt Lydia’s Classic Crochet Thread (100% mercerized cotton, 350 yd/320m per ball) color 0420 Cream
    • 4 very small stitch markers (best bet: tiny jewelry jumprings, available in the jewelry section of many craft stores)
    • Stitch holders (preferably 2 large safety pins)
    • A small button or pin, or other closure for the front
    • Scissors, ruler, & darning needle
    You will need to know:
    • How to knit and purl, and 1x1 rib
    • How to yo
    • How to place stitches on a holder and rejoin yarn
    • How to BO in 1x1 rib
    Gauge: 11 sts/per inch in stockinette stitch on size 1-US needles.  To ensure accurate sizing, be sure to check your gauge.

    Note:
    You will need to have a separate ball of yarn for working the sleeves and body, or two ends from the same ball.  Since I work from a ball of crochet thread, I wind about 10 yards of thread onto a bobbin (the small Susan Bates kind, in my favorite color – purple) to hold aside for the sleeves.  Cut the yarn, begin the sweater, and you won’t have to break the yarn to work the sleeves and then rejoin it to work the body.

    Capelet:
    CO 23 sts.  K in 1x1 rib for 3 rows.
    Place markers: k5, pm, k4, pm, k3, m1, k3, pm, k4, pm, k4.

    Begin raglan increases:
    Increase row: k2, *p to marker, yo, slip marker, p1, yo, rep from * to last 2 sts, k2.
    Next row: K all sts.

    Repeat the above two rows until you have 72 sts on the needles.

    Next row: slip 11 sts onto a spare DPN or stitch holder. 
    *Rejoin yarn and p 15, turn and k15, then work 3 rows of 1x1 ribbing and BO in rib.

    Slip 20 sts onto spare DPN or stitch holder.  Repeat above step (from *) for second sleeve.

    Rejoin all remaining sts onto one needle.  Continuing with unbroken yarn:
    K2, p to 1 st before gap, p2tog, p to 1 st before next gap, p2tog, p to last 2 sts, k2.
    K one row; p one row.
    Work 3 rows of 1x1 ribbing and BO in rib.
    Seam sleeves to underarm.  Weave in all ends.  Block if desired.
    Place a button or pin to close the front of the capelet.